Showing posts with label Spellbinders. Show all posts

Wednesday, January 29, 2014

Beribboned Basket


I think this stamp is just the sweetest image in the whole wide world.  I might be a bit biased, living in Iowa.  And in a Dairy Barn.  But I think it just makes lovely springtime cards, especially when colored with the pale, pale Copics.

You can learn how to make the pretty ribbon weave basket here:
voila! The stamp and the finished basket.
 I will warn you it is a slightly epic undertaking, but it can be done :-) By the fourth panel you will be a pro.

a little bit closer detail

Just so fresh and darling.  I can almost pretend spring is here with apple blossoms, newborn calves and fluffy chicks.  And no howling blizzards and double digit negative temperatures (boo)  oh well, being stuck inside allows plenty of time for weaving ribbon panels, lol!


You can find the stamp here: Door County Rubber Stamps or if you happen to be in my neck of the woods here: Backroads Plum Crazy

Monday, October 3, 2011

Fall Magic WCMD 2011

Happy Monday, everyone!  It is a beautiful fall day, the leaves have changed, the mums are blooming, and the scarecrow is the next thing on my to do list :-)

It is the perfect day to announce the winner of this Fall Magic Box Kit!
Drumroll please.....

The winner is Pamela Young!  Your name literally fell in my lap during the drawing, lol.  Please e-mail me at donya at backroadsplumcrazy.com with your contact information by October 17th, 2011.

I taught this as a class this time last year at Door County Rubber Stamps in Egg Harbor.  We had so much fun!  Everybody made such beautiful boxes.  I think the most popular part was making the paper rose and coloring it with Twinkle H2Os.

Here are the instructions for everyone who wants to try this at home:   Fall Magic Box

Well I hunted and hunted for the diagram I had made for folding the sturdy little origami box that makes up the heart of this project to no avail.  But hurrah! Splitcoast Stampers are the best :-) they had a step by step list of how to make it.  
Just go here: 

Supply List Details:

  • Stamps are all available at Backroads Plum Crazy or directly from Door County Rubber Stamps
  • I used decorative paper from Cosmo Cricket Flueriste Paper (Vineyard & Dew Drops) & Cosmo Cricket Flueriste Cardstock Stickers on the inside of each notecard
  • I used the Marvy Embossing Oak Leaf Punch and the McGill Designer Series punches to make the foilage out of vellum.  Since then Spellbinders has come out with some really excellent foilage dies that I would highly recommend.
  • I stamped my main image, cut it out with Spellbinders Nested Maple Leaves (S4-228), colored the girl and branches with Copics, then created sky and leaves with a blending tool and distress ink.
  • Brown Vine & the Antique Gold Silk Ribbon are from May Arts and are to die for.  Swoon.

That's all for today folks!  If you have trouble with any of the steps or questions, don't hesitate to shoot me an e-mail. Have fun and thanks for visiting!


Monday, September 26, 2011

Harvest Glow

It is another rainy Monday, but the leaves are starting to change, and I have a bushel of honeycrisp apples and a gallon of apple cider.  Things to be thankful for.  I think I'll go heat a cup of that cider while I tell you about this pretty thing. 


It's hard to see in the cloudy gray light, but the card base is a deep plum.  The rest paper is from the Harvest Glow collection by Reminisce.  I love Reminisce because #1 they are from Iowa, like me, and are therefore super cool, and #2 Reminisce is eclectic.  They have more than one style in their bag of tricks so you never, ever say Oh, yep, that again.  #3 and final is that they made Harvest Glow.  People just about fall over when they see this one in person at Backroads Plum Crazy. It is so beautiful!!! Now there's pretty paper and beautiful paper, this is the latter.  It glows (hence it's name) and is just lovely, classic, and warm like apple pie.  Ach, just impossible to describe so you better just go look here at Reminisce's site. Or better yet, go buy some.  Because it's better in real life, believe me. 


The stamp is of course, my favorite Door County Stamp.  I used Memento Cocoa Brown to stamp her so the lines wouldn't be so prominent after I colored her in with copics.  I think if I make more of them for card club, I'll try it in Potters Clay so she just looks painted.

To make the frame cut and emboss Spellbinders Classic Frame, but leave it in the die.  Stencil Aged Mahogany distress ink through the openings in the die, then pop it out and go over the whole frame with Vintage Photo.  Looks like the Classic Frame must be discontinued since I don't find it on the Spellbinder site.  Pity, it's very useful.  Hope you have one already :-)

Supplies used:
Memento Cocoa Brown Ink
Copic Markers
Kaisercraft mint flowers
Door County Stamp- Blowin' in the wind
Spellbinder Classic Frame Die S5 012
Glitz Teeny Letters
Reminsice Harvest: Harvest Plaid (just one sheet front and back)


Mmm, warm spiced cider and crunchy maple leaves.  Hello fall!

Wednesday, February 9, 2011

Love Notes


My first fling with Cricut Design Studio.  Oo la la, the romance, it has begun!
  
  1. Weld the shadow from LOVE from Home Accents with the square from George.  
  2. Add a few wings from Indie Art to a Door County Girl to turn her into a sweet little cupid.
  3. Dangle the smallest scallop heart from a string.

Saturday, March 20, 2010

Made with Love

The challenge is use only cardstock and the papers from a Basic Grey paper pack I've had in my stash for about a year.  A friend of mine was also feeling uninspired by the Scallop Heart Nesties she had bought, so to make things interesting, use this set of dies on every. single. one.   Turned out limiting your supplies is a great way to get inspired.


I stamped the my little baker twice.  Once on the oval and then on a scrap so I could cut her out and layer her over everything with foam dots, making it look like her little kitty is behind her skirt.  Ah, I love dimension.  Speaking of dimension, if you haven't used liquid pearls may I highly recommend them to you.  The red makes great little holly berries, or in this case, cherries and the other colors have a ton of uses too (perhaps a line of ivory pearl buttons marching down the back of a Victorian girl's gown, which you can see larger if you click on the image below).  I don't empathize with this stamp, nope.  Have you checked out Joy the Baker today?  Or the Cupcake Bakeshop?  Stamping and complex carbohydrates, there really is no better combo in my book.  Plus the occasional adorable cat trying to trip you and make off with the goodies.


Card number 11:

Supplies:
Door County Rubber Stamps Holiday Baking
Inkadinkado Sentiment
Ranger Ivory & Red Liquid Pearls


May Arts Burgandy Silk Ribbon
Copic Markers
Kaisercraft Pink Rhinestone, Rhinestone Strips
Basic Grey Bittersweet Paper Pack


Spellbinders Classic Ovals, Scallop Ovals, Classic Hearts & Scallop Hearts


Thursday, March 18, 2010

Hearts Desire

The challenge is use only cardstock and the papers from a Basic Grey paper pack I've had in my stash for about a year.  A friend of mine was also feeling uninspired by the Scallop Heart Nesties she had bought, so to make things interesting, use this set of dies on every. single. one.   Turned out limiting your supplies is a great way to get inspired.


I used a silver paint pen on these scallop hearts, to gussy them up a little and accent their ruffles, plus then you don't really need to layer them up with the straight edge heart nesties sine you have a two tone look already.  Sweetness.


Card number 10:

Supplies:

Krylon Silver Paint Pen


May Arts Two Tone Ribbon
Copic Rose Pink Marker
Kaisercraft Rhinestone


Crafty Secrets Lucky Wishes Stamp Set


Basic Grey Bittersweet Paper Pack


Spellbinders Classic Ovals, Labels Four & Scallop Hearts


Tuesday, March 16, 2010

Shine On

The challenge is use only cardstock and the papers from a Basic Grey paper pack I've had in my stash for about a year.  A friend of mine was also feeling uninspired by the Scallop Heart Nesties she had bought, so to make things interesting, use this set of dies on every. single. one.   Turned out limiting your supplies is a great way to get inspired.


I used pens to add just that last little touch to accent this card.  Spicas add a tasteful hint of sparkle and color to the sentiment and a gold paint pen makes the one little rhinestone into a great focal point.  You could make tons of these cards for pretty minimal money if you think about it.  I mean, just think how many rhinestones are in one of those Kaisercraft packs. 

Card number 9:
Supplies:

Marvy Uchida Fine Point Gold Paint Pen
Copic Spicas
EK Success Postage Border Punch
Kaisercraft Rhinestone


Crafty Secrets Christmas Stamp Set

Basic Grey Bittersweet Paper Pack


Spellbinders Classic Hearts & Scallop Hearts


Sunday, March 14, 2010

Onions have Layers, Ogres have Layers

The challenge is use only cardstock and the papers from a Basic Grey paper pack I've had in my stash for about a year.  A friend of mine was also feeling uninspired by the Scallop Heart Nesties she had bought, so to make things interesting, use this set of dies on every. single. one.   Turned out limiting your supplies is a great way to get inspired.


Okay, so no ogres, or onions.  But there are layers, lots of heart layers, and more Ellie Pooh paper, which ogres must surely approve of.
Card number 8:
Supplies:
Ranger Inkessentials White Pen (my favorite to date)
Crafty Secrets Kewpie Stamp Set
Basic Grey Bittersweet Paper Pack
Ellie Pooh Paper
Spellbinders Classic Ovals, Classic Hearts & Scallop Hearts
You could stitch this, but setting up my sewing machine means cleaning a space.  I'm not a big fan of decluttering, so I use faux stitching.  Just use a white gel pen to create a dashed line border all around your card.  I was really pleased at how well the Ranger pen worked on the super fibery Ellie Pooh paper.


Friday, March 12, 2010

Two Hearts, One Love

The challenge is use only cardstock and the papers from a Basic Grey paper pack I've had in my stash for about a year.  A friend of mine was also feeling uninspired by the Scallop Heart Nesties she had bought, so to make things interesting, use this set of dies on every. single. one.   Turned out limiting your supplies is a great way to get inspired.


I stamped a sentiment on vellum that layered over my patterned Bittersweet paper so soften the look and really make my two scallop hearts show up.  I made the vellum top layer just a tad longer than the pattern paper mounted them flush together and then attached the two together to the card base with foam dots making it all floaty and romantic.  The card base is made from Ellie Pooh paper, which is really cool and earthy but not so romantic when you know it's made from elephant poop!

Card number 7:
Supplies:
Basic Grey Bittersweet Paper Pack
Ellie Pooh Heavyweight Paper
May Arts Two Tone Ribbon
Inkadinkado Sentiment
Spellbinders  Scallop Hearts


Wednesday, March 10, 2010

Hay

The challenge is use only cardstock and the papers from a Basic Grey paper pack I've had in my stash for about a year.  A friend of mine was also feeling uninspired by the Scallop Heart Nesties she had bought, so to make things interesting, use this set of dies on every. single. one.   Turned out limiting your supplies is a great way to get inspired.


Here's one for all my rural homies especially the ones who've ever bottle fed a calf.  There are few things sweeter than those big brown baby cow eyes peering up at you.  Except for maybe if those big brown calf eyes are peering at you out of George Clooney's face ;-)
This pun is courtesy of River City Rubberworks, makers of probably some of the funniest sentiment stamps ever.

Card number 6:
Supplies:
Basic Grey Bittersweet Paper Pack
May Arts Two Tone Ribbon
American Crafts Thickers
Door County Rubber Stamps Best Pals
Spellbinders Doodle Parts, Classic Ovals, Classic Hearts & Scallop Hearts
Kaisercraft 12" Pink Rhinestone Strips


Monday, March 8, 2010

A Paisley Heart


The challenge is use only cardstock and the papers from a Basic Grey paper pack I've had in my stash for about a year.  A friend of mine was also feeling uninspired by the Scallop Heart Nesties she had bought, so to make things interesting, use this set of dies on every. single. one.   Turned out limiting your supplies is a great way to get inspired.


You can click on the pictures to see larger versions.
I'm normally not a big fan of paisley, but.... I just love this marbled paisley from Bittersweet.  It just makes everything so lush.  I heart it, like I need a full 25 pack of it just for me.  Candy.
It's a bit hard to see, but I used Spellbinder's Impressabilities on the bottom half of the card base.  I like the look and I love that there aren't any edges from an embossing folder because there is no embossing folder, but I'd really prefer a deeper more dramatic emboss.  I think some experimenting with cardstock shims may get me the look I'm going for.  How fun is having a pink inside of your card?  Totally fun :-)
Card number 5
Supplies:
Basic Grey Bittersweet Paper Pack
Spellbinders Impressabilities & Scallop Hearts
Tim Holtz Distress Ink Tattered Rose, Worn Lipstick & Tea Dye

May Arts Sheer Organza Heart Ribbon
Look Ma! No Stamps! (shocking I know)


Saturday, March 6, 2010

Yippee!

The challenge is use only cardstock and the papers from a Basic Grey paper pack I've had in my stash for about a year.  A friend of mine was also feeling uninspired by the Scallop Heart Nesties she had bought, so to make things interesting, use this set of dies on every. single. one.   Turned out limiting your supplies is a great way to get inspired.


You can click on the pictures to see larger versions.
Distress Ink is really handy to have on hand.  It's cheap and adds such a nice finish to things.  I keep my blending tool out all the time.  And I do mean ALL.  A cosmetic foam wedge would probably work for most of what I do with it, which is going over my paper edges.  It makes things look just a tad more well, I don't think "polished" is quite the right word,  I guess I'll go with "distressed" lol.
This card is an inside joke with Michelle from the shop in addition to being a pretty little thing.
Card number 4:


Supplies:
Crafty Secrets Kewpie Stamp Set
Basic Grey Bittersweet Paper Pack
Spellbinders Nested Flowers (discontinued), Classic Hearts & Scallop Hearts
Tim Holtz Distress Ink Tattered Rose, Worn Lipstick & Tea Dye

SEI Rhinestone Brad
Scor-It Board (used to create embossed lines on the card base)


Thursday, March 4, 2010

Jewel of my Heart(s)

The challenge is use only cardstock and the papers from a Basic Grey paper pack I've had in my stash for about a year.  A friend of mine was also feeling uninspired by the Scallop Heart Nesties she had bought, so to make things interesting, use this set of dies on every. single. one.   Turned out limiting your supplies is a great way to get inspired.


You can click on the pictures to see larger versions.

Card number 3:
Supplies:
Cosmo Cricket Mr. Campy Green Velvet Scallop Ribbon
Crafty Secrets Sentiments Stamp Set
Basic Grey Bittersweet Paper Pack
Spellbinders Classic Ovals, Classic Hearts & Scallop Hearts
Tim Holtz Distress Ink Tattered Rose, Worn Lipstick & Tea Dye
Kaisercraft Silver Rhinestones


Tuesday, March 2, 2010

Sending Love

The challenge is use only cardstock and the papers from a Basic Grey paper pack I've had in my stash for about a year.  A friend of mine was also feeling uninspired by the Scallop Heart Nesties she had bought, so to make things interesting, use this set of dies on every. single. one.   Turned out limiting your supplies is a great way to get inspired.


This one is one of my favorites and I completely scraplifted it off of another person here (lots of great inspiration, really you should go check it out)

Card number 2:
Supplies:
Martha Stewart Lattice Arch Border Punch
Crafty Secrets Kewpie Stamp Set
Basic Grey Bittersweet Paper Pack

Spellbinders Classic Ovals & Scallop Hearts
You could use a template or a cricut to create a little envelope, but I just folded in the corners of a scrap square of white cardstock to make mine.  Easy peasy.


Sunday, February 28, 2010

Heart Attack

Well I'm home sick today (the shop is open Sunday afternoons) with what is hopefully the last grand headcold of the season, so I'm all curled up with my laptop, my laptop cord munching kitten, and watching glorious weather reports of rain.  Rain! So exciting to have rain not snow :-) and it's not even going to be FREEZING rain. Spring is definitely on the horizon.  So I'm going to spread the love and catch up with you, my bloggy buddies, with a series of hearty cards.
The challenge is use only cardstock and the papers from a Basic Grey paper pack I've had in my stash for about a year.  A friend of mine was also feeling uninspired by the Scallop Heart Nesties she had bought, so to make things interesting, use this set of dies on every. single. one.   Turned out limiting your supplies is a great way to get inspired.


Card number 1:

Supplies:
Basic Grey Bittersweet Paper Pack
Mark Richards Rhinestone Alphabet (X &O)
Spellbinders Classic Hearts & Scallop Hearts
Kaisercraft 12" Pink Rhinestone Strips
The Greeting Farm Pirate Anya (I think she's been discontinued, but there's lot's of other great characters there that would look just as cute, like this sassy little number)


Wednesday, February 18, 2009

Oh Boy!


Paper:          Daisy D, Anna Griffin
Die Cuts:      Elephant & Balloons by Cricut
                   Label 1 by Spellbinders
Stamps:        Brayton Alphabet by JustRite

Sorry for the blurriness of the photo.  Every have one of those days where no matter how you sweet talk your camera, it's not going to take a good shot?  Today was one of those days.

This card was made for a Baby themed card swap, but since all my friends (and I) are lining up to be Old Maids, I thought I'd come up with something that could swing for birthdays or other festive events as well, preferably ones that involve cotton candy.  I love cotton candy :-)  What you can't see due to excessive blurriness, is that I sanded nearly every square inch of that card and then rubbed brown ink over it in an artistic manner.  Even the elephant, who looks way cool distressed, btw, like an 1950s storybook about a circus that was very well loved.


Friday, February 6, 2009

Might as Well be Spring

Hooray, hooray~ It's up above freezing today!  The birds are singing and the dog is chasing them all the way to the neighbors farm.  Definitely something Springish in the air, groundhog be darned.  Here's a pretty little card to celebrate:


This is an uber simple card, easily replicated for masses of Valentines or birth announcements, you don't even have any major coloring to do, just stamp the main image (Crafty Secrets) in Versafine Black ink.  Normally I stamp images with Tsukineko's Archival Brillance Graphite so I can color them with Copics and not worry about bleeding, but with really detailed images you need that Versafine or you are going to wind up with a blob.  A very sad blob.

I did this card once using Marvy punches and one with Spellbinder Nestabilities in what I suppose could be called a cardmaking version of the WWF Smackdown.  Guess what? Nesties won, hands down.  They just look way more polished, especially when you are working with vellum, like on the background scallop here.  One other thing you can't do with the punches in that reverse stenciling technique to create a border (you can see a how to on reverse stenciling a couple of posts back, the blog party post).  Nope that's not an extra piece of tan cardstock behind the main image, I just inked up the die itself with a light brown fluid chalk inkpad.


Wednesday, January 21, 2009

A big THANK YOU!!!!!! and Blog Candy!

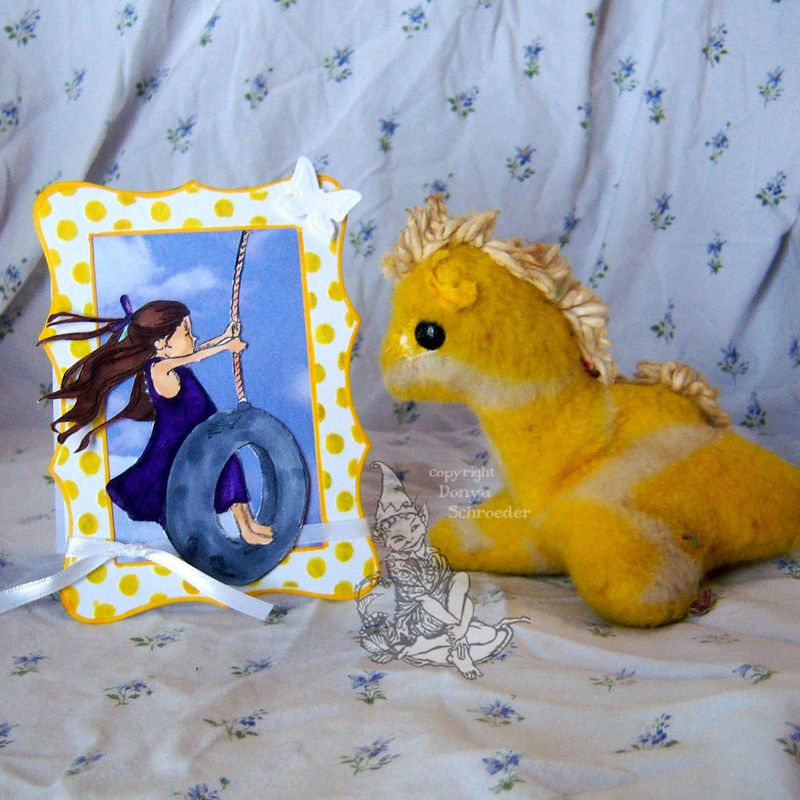
I got a lot of great comments on the tire swing stamp I used on this yellow card (also seen at the bottom of my Spellbinders reveal entry)  She's a Door County Kid made by Door County Rubberstamps.  We sell them at Backroads Plum Crazy, but if you can't get here or to Oscar's shop in Door County then do visit their website- their stamps are so adorable and work great with Copics!


I figured while we were "in the swing" (har har)) of giving away fantabulous things, I'd throw out some more blog candy!  E-mail me by Saturday (the 24th of January) 11:59 PM CST at donya@backroadsplumcrazy.com and put "tire swing" as your subject line for a chance to win your very own!


Stamps:  Tire Swing by Door County Rubberstamps
                Live by Inque Boutique

Ink:        Tsukineko Brilliance Graphite
Paper:    Buttercream Cardstock
               Yellow Gingham Paper from my stash bought eons ago
               White Cardstcock
               aged teal scrap

Extras:   Copic Sketch markers, Spellbinders Classic Circle and Pinking Circle dies, Pop Dots


Saturday, January 17, 2009

Spellbinders Blog Frenzy


"Thanks to everyone who entered the Spellbinders' 5th Anniversary Party to win my Die Template release. You can no longer enter to win my release. Please check out Linda and Trudee's blogs for two more chances to enter the contest.

Check the  Spellbinders Blog for the announcement of Daily Winners. Grand prize winner will be announced on January 30th."
PLEASE NOTE: Commenting on this post is (very!) welcome but does not enter you into the contest. This contest is sponsored directly by Spellbinders Paper Arts. Please read the post to find directions for entering the contest. If you have any questions, please e-mail ContestQuestions@spellbinders.us.
Oh!  I love this time of year!  Everybody is coming out with all of their new lines for the year, but I think Spellbinders has topped them all for their 5 year Anniversary!  They came out with some really excellent dies this time around (I love, love, love the ones I got!), plus Spellbinders is celebrating their 5 year anniversary by sharing 16 days of sneak peeks, with LOTS of drawings for dies!!  Today there will be a drawing for the die I am showing you (the perfectly perfect Polka Dot Frame) and the previously revealed dies during the Spellbinders 5 Year Anniversary celebration.   Each day an additional die is added to the daily giveaway list for a grand total of more than16 dies on the 16th day of reveals!  Holy Smokes, that’s a LOT of prizes!

You’ll want to be sure and catch the two remaining sneak peaks!
JANUARY 19: Linda’s Works of Heart by Linda Duke
[http://lindaduke.typepad.com/lindas_works_of_heart/]
JANUARY 20: Follow Your Bliss by Trudee Sauer
[http://trudee.blogs.splitcoaststampers.com/]
Winners will be announced on Spellbinders blog at http://www.spellbinderspaperarts.com/blog
And don’t forget you have until 11:59 PM on January 18th, 2009 to sign up for the give-away on Sally Lynn’s Blog [http://inkyheart.typepad.com/]!
The die template I’m revealing today is the Polka Dot Frameability.  I love Polka Dots!  They are so fun!  I mean can anyone just think “Polka Dot” and not smile :-) ?  The new Polka Dot Frameability is super versatile, skipping from fun and kitschy, sweetly vintage, or even elegant with just a switch of papers and ink.


Here’s the information you’ll need when it comes time to hunt this little number down:  Polka Dot Frame: SKU # S5-016, MSRP $24.99
This die is a natural for all fashions of paper artsiness, it would be lovely on a scrapbook page, great on a card front, and lends itself to off the page uses as well.  When I got mine in the mail, I’d just come home from having New Year’s brunch at Chez Colette (a wonderful little casual French restaurant at the Sofitel in Minneapolis). With La Vie en Rose stuck in my head and cafĂ© au lait humming through my veins, I thought I’d make a little gift bag any lover of French couture would be proud to receive.


This project is surprisingly green; you only really need two pieces of paper, everything else is from the thrift store or *ahem* rifled from your grandmother’s sewing room.

For the bag you will need:
A die cutting machine (I love the Wizard and think it gives the best results)
Polka Dot Frame Die Template
Webster’s Pages Bloomin’ Beauty Paper
Worldwin Light Totally Tan Cardstock (this about the color of antique book paper which you can use if you aren’t concerned with your bag being acid free)
Silk and/or satin ribbons (yum!)
Two buttons
Old Sewing Pattern (preferably some size small horror that no one in their right mind would ever want to actually use)
Sewing Machine
Foam Dots
Craft Glue (I love Beacon’s 3 in 1 Craft Glue, dries super fast and strong)
Charcoal Gray or Black Ink Pad
Copies of a great old photo
The bag itself is blindingly simple.  Score and fold the red polka dot paper in half.  Tape or pin a length of black satin ribbon on each side to make a handle.  Then stitch the ends shut with a zig-zag stitch on the sewing machine.


Using craft glue or some heavy duty double-sided tape, attach a ribbon band around the entire bag.


Now here comes the fun part! The frame! The pictures here are using the Wizard, which I find to be the best machine on the market (I do own another machine but it is a very dusty and unused thing), and we are all about quality, no? ;-)

Here’s a step by step of how I created the frame, if you are new to the Wizard or want to see how to easily use the Spellbinder dies in whatever machine you have at home, I’ve included a video demo by Stacey Caron at the bottom of my instructions.

Put your Polka Dot Frame (the biggest one) rough side up on the magnetic spacer plate (or white spacer plate if you have the Purple Wizard).


Place your tan colored paper on top of your die.


Put your second white mat on top, and run it through your machine to cut the base frame out.


Now here’s where the die starts getting special.  Keep your paper in the die but remove the spacer plate and put the tan embossing mat on top of your paper.


Put on the top white mat, and run the sandwich through your machine.  You now have lovely embossed polka dots… but wait there’s more!  We’re going to stencil through the die!


This step works really well with smaller ink pads, but daubers of various kinds (example: cotton balls) work too.  Rub the ink pad all over the open spaces in the die.


Wow! Check out those perfect little charcoal colored polka dots!  No way could I have done those by hand!  Now trim your photo to fit your frame and mount them together.


Repeat the above cutting and stenciling with the smaller polka dot frame die.  Use this frame around your sentiment.


Okay, now you’ve got regular stenciling down, let’s kick it up a notch. Reverse Stenciling! This time ink up the smaller quatrefoil (clover shaped) die itself.


Then cut/emboss like normal.  Pop the paper out of the die and you’ve got a perfect border! 
Now just top it with a button.


And attach it to the smaller Polka Dot Frame.


Now put it all together on the bag with a little foam tape or pop dots.


I made a simple pin to attach to the bag handle, using the new Peony (S4-193) die template set and an old sewing pattern.  Haute couture!


If you’re feeling like you want to go on with your Polka Dot Party, create a card to go with the bag from some leftover tan cardstock.  I really like how you can create the look of a shaped card with this die simply by making your card base slightly smaller than your frame (a 3.25 x 9.5 strip folded in half is about perfect)


While I was creating this project it started snowing again.  So I decided to take my own advice (Warm Wishes!) and make a summery little card using the same basic technique.


Here are the videos I promised: http://spellbinderspaperarts.com/videos

Now the important  stuff- CONTEST RULES!!!!!!

Spellbinders 5 Year Anniversary Celebration
Sneak Peek Party Drawing Information

Spellbinders will randomly pick one entry from each of the 16 Spellbinders Sneak Peek Blog reveals as stated in the “Rules”. This name will be drawn to receive the die being revealed and any other dies listed as a part of said blog give-away.  These entries must follow all rules stated below to be valid for the drawing. 
Entrants visiting all 16 Spellbinders 5 Year Anniversary Celebration Sneak Peeks Blog reveals and correctly entering their information into the 16 separate drawings, as described below, will automatically be entered into a GRAND PRIZE give away of a full set of all 28 NEW RELEASE dies debuting at the Winter Craft and Hobby Association Show in Anaheim, California, on January 25-28, 2009!
Rules

Any participant wishing to be included in the daily drawing for the Spellbinders Birthday Celebration Sneak Peek die give away must adhere to all of the following rules:
1. Participant must click on the provided link on Reveal blog to enter each     individual drawing on sneak peeks between January 5 and January 20, 2009.

2. Participant must type in the subject line the name of the die being revealed. 

3. Participant must send their entry for this blog before 12:00 midnight Central Standard Time on January 19, 2009.
4. Participant is only allowed to enter each of the 16 Spellbinders sneak peek blog give away drawings one time per sneak peek. Participant must use the same email address daily to be considered for grand prize entry, no exceptions. Please consider whether you will have access to the same e-mail from January 5th through the 20th and plan accordingly.
5. Spellbinders Design Team members and employees are not eligible for drawings. 
 Any participant wishing to be automatically entered into the drawing for the Spellbinders 5 Year Anniversary Celebration Sneak Peek Grand Prize drawing, must enter the drawing from all of the 16 blog reveals and follow all the above rules.
Please note:
*Spellbinders will only use email information to contact the winner.
*Spellbinders will not share this email address with any other parties. 
*Spellbinders will not use this email information for advertisements or communications other than to contact the winner.
*If you wish to be included in further communications from Spellbinders, please go to their homepage SpellbindersPaperArts.com and sign up for their newsletter.
For more Spellbinders product release information go to www.SpellbindersPaperArts.Com
If you have any questions regarding the contest, please e-mail ContestQuestions@spellbinders.us


Thanks to everyone who stopped by, hope you are feeling inspired by all the great projects, and good luck!
-Donya


Friday, November 21, 2008

Pssst

You should head on over to the newly unveiled Spellbinders website http://www.spellbinderspaperarts.com   It's really great, very pretty and most importantly-much, much easier to use.  Check out the Inspiration Alley to see large images of projects or check out the new Blog for neat techniques and giveaways!